REVIEW · VENICE
Venice Photography Masterclass – Private Photography Lesson
Book on Viator →Operated by Aperture Tours · Bookable on Viator
Venice teaches photography fast. This private masterclass pairs you with a professional photographer for a tailored walk through the city’s most photogenic spots, from Piazza San Marco to the Grand Canal, with real instruction for daylight, sunset, and night. It’s built for people who want photos to improve quickly, not just a sightseeing stroll.
I especially like the hands-on focus on camera settings. You’ll work on aperture, shutter speed, and ISO, and practice until you can see the difference in your frame. I also love the day-to-night structure: shooting around landmarks in daylight, then chasing sunset, and finally trying night tricks like long exposures and light effects.
One possible drawback: there’s no hotel pickup, so you’ll want to plan an easy walk or short transit to Campo San Vidal and back again.
In This Review
- Key things to know before you go
- Why this private Venice photography lesson works
- The 3-hour route: from Piazza San Marco to Grand Canal night photos
- Piazza San Marco: learning exposure where the light is loud
- Central Venice walk: composition practice without the pressure
- Ponte di Rialto: iconic framing plus real-world shooting
- Ponte dell’Accademia: a bridge for angles and alternatives
- Campanile di San Marco: tighten your frame and control contrast
- Sunset and twilight: setting up for atmospheric Venice
- Night photography on the Grand Canal: manual control and light effects
- Gear and practical shooting tips for Venice conditions
- Price and value: is $204.25 per person worth it?
- Who should book this private Venice photo masterclass
- Should you book it?
- FAQ
- How long does the Venice Photography Masterclass take?
- Is this a private lesson or a group tour?
- Where do we meet, and where does the tour end?
- What language is the class taught in?
- What locations will we photograph during the lesson?
- Are there admission tickets included for the stops?
- Do you provide hotel pickup or drop-off?
- What if the weather is bad?
- Is there an extra access fee for some visitors?
Key things to know before you go
- Small private group (max 4 people), so the coaching stays practical and personal
- Daylight to night plan: St Mark’s area, Rialto, then sunset and Grand Canal night photography
- Camera instruction that’s usable fast: manual settings plus techniques for changing light
- Iconic viewpoints plus options for your interests via a tailor-made route
- Works in all weather, so you’ll need to dress for wet or chilly conditions
Why this private Venice photography lesson works
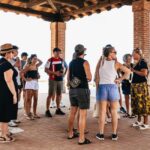
Venice is all angles. The canals twist, the bridges force perspective, and the light keeps changing every 10 minutes. A private photo lesson makes sense here because you’re not just looking—you’re learning how to see. With a small group cap (four), you get time to ask questions and actually test settings in the real environment, not later in your hotel room.
The instruction is built around what your camera does in Venice light. You’ll practice with core exposure tools—aperture, shutter speed, ISO—and then apply them across daylight, sunset, and night. That’s the big win: you leave with a method you can reuse the next day on your own.
It’s also a good fit if you’re not fully comfortable with your gear yet. One of the best signals is the tone from past participants: people who were stuck after learning a new camera body found the session helped them get started, fast. Another booking had one-on-one time for the whole session when the group was tiny, and it showed how much you can get done when the instructor can focus on your camera and your questions.
The only thing to watch is cost. At $204.25 per person, this is a premium add-on. If you’re traveling with a partner and both of you will shoot a lot, it can feel more reasonable. If you’re hoping for a casual, low-effort tour, the price may feel steep.
You can also read our reviews of more private tours in Venice
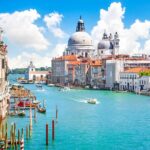
The 3-hour route: from Piazza San Marco to Grand Canal night photos
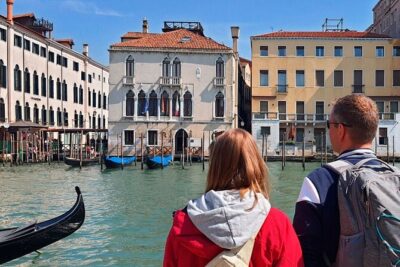
This masterclass runs about three hours, and it’s paced like a photo shoot, not a museum line. You meet in central Venice at Campo San Vidal (Campo S. Vidal, 30124 Venezia VE). The session ends back at the same meeting point, so you’re not stuck figuring out transit after dark.
The stops are designed around classic views plus practical practice time:
- Piazza San Marco area
- central Venice (walking and framing practice)
- Ponte di Rialto
- Ponte dell’Accademia
- Campanile di San Marco area
Then you move into sunset and night photography along the Grand Canal.
Each main stop is about 30 minutes, with no admission tickets required for those segments. That matters because it keeps the focus on shooting rather than waiting.
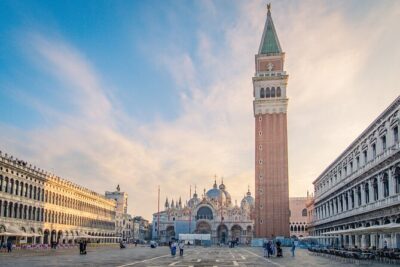
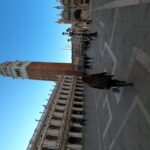
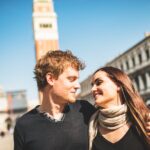
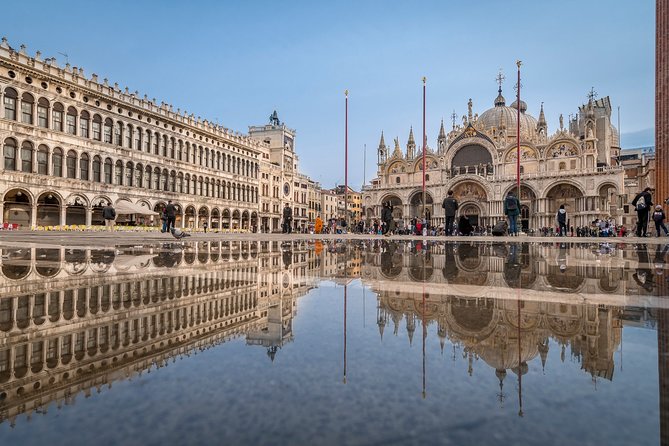
Piazza San Marco: learning exposure where the light is loud
Piazza San Marco is the place where Venice brightness hits you in the face—in the best way. In a short 30-minute window, you can learn quickly how your camera handles contrast: bright stone, deep shadows, and quick changes as clouds drift.
This is where you’ll start working on fundamentals. Expect guidance on setting exposure so your photos don’t end up too dark on shaded details or blown out on bright highlights. The goal is to help you understand what aperture, shutter speed, and ISO actually do to your picture—while you can still see the results immediately.
Practical tip: if you bring a camera with auto modes, great. Use them to find your framing, then switch to manual (or the mode your instructor recommends) so you can train your eye and hand together.
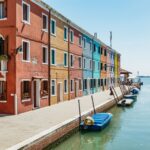
Central Venice walk: composition practice without the pressure
One part of the route is described as the City of Venice area, and that flexibility is useful. This stretch is where you can work on composition and camera angles without being locked into one single “postcard” viewpoint.
I like this kind of segment because it teaches you what to do between the big landmarks:
- how to choose a focal point
- how to frame diagonals and bridge lines
- how to position yourself for cleaner backgrounds
- how to keep your subject sharp while the city moves around you
If you’re the type who usually gets overwhelmed by famous scenes, this is the time when the instructor can bring you back to basics.
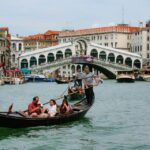
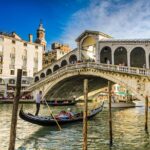
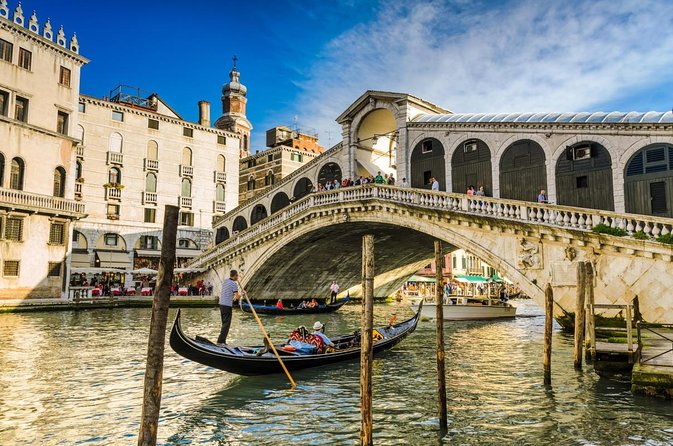
Ponte di Rialto: iconic framing plus real-world shooting
Rialto is one of those places where everyone wants a perfect shot. The trick is that crowds and crowds of angles can make it hard to slow down and think.
At the bridge, you get another concentrated 30 minutes to practice your settings while you’re dealing with changing brightness, people, and reflections. This is also where you learn to manage your camera behavior: what happens to shutter speed when you want sharp architecture, or what changes when you’re okay with a softer look in the water.
If you like architecture, you’ll probably enjoy this segment most. If you prefer people-in-the-scene storytelling, it can also work well—just be ready to direct your framing quickly when the light shifts.
You can also read our reviews of more photography tours in Venice
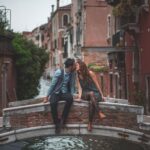
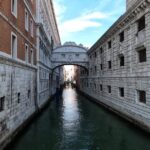
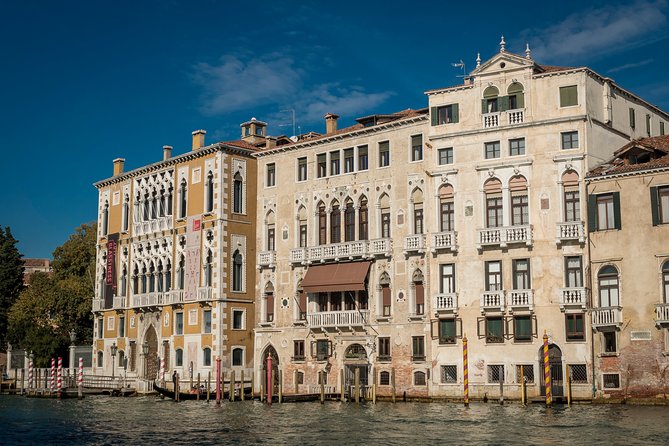
Ponte dell’Accademia: a bridge for angles and alternatives
The route includes the Ponte dell’Accademia area, which is a smart move for photographers. It gives you a different view of the Grand Canal corridor than what you get at Rialto, and it helps you build your “angle library” for Venice.
Even in a short stop, this is where you can experiment:
- wider compositions that include canal lines
- closer crops that reduce background clutter
- higher or lower viewpoints to change how the skyline reads
If your instructor customizes based on your interests, this is the kind of stop that often turns into personalized coaching—because bridges are basically instruction stations for perspective.
Campanile di San Marco: tighten your frame and control contrast
Campanile di San Marco is a classic subject, but the way you photograph it can vary a lot depending on where the sun sits and what the shadows do.
In the final landmark-focused stop, you’ll likely keep working on exposure and composition—especially contrast control. Venice can trick your camera. Bright sky can wash details, while shaded facades can swallow texture. The instruction helps you adjust so stonework and architectural edges stay readable.
This is also a great point to think ahead: you’re approaching sunset and twilight, so settings you used earlier might not work the same way. Use this time to build a habit of checking your histogram (if you use one) or simply reviewing your shot quickly and adjusting.
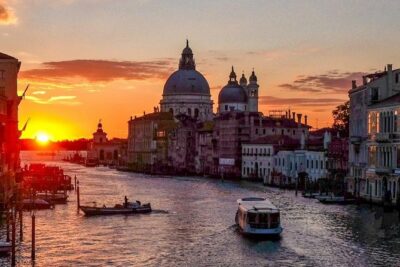
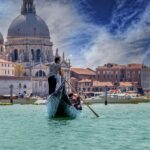
Sunset and twilight: setting up for atmospheric Venice
After the landmark sequence, the tour shifts toward scenic spots for sunset and the first moments of twilight. This is where the city looks its most cinematic—and where your camera settings need to catch up.
Sunset photography is about timing and transitions:
- daylight color fades fast
- reflections change as brightness drops
- backgrounds go from bright to dark enough that longer exposures become realistic
You’ll want to be ready to move quickly to a good viewpoint, because the best light doesn’t wait. This is why having an instructor helps; they know where to take you within the limited time window and how to help you keep your camera settings consistent through the shift.
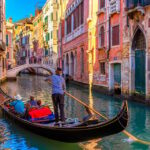
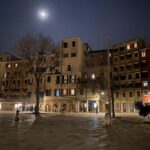
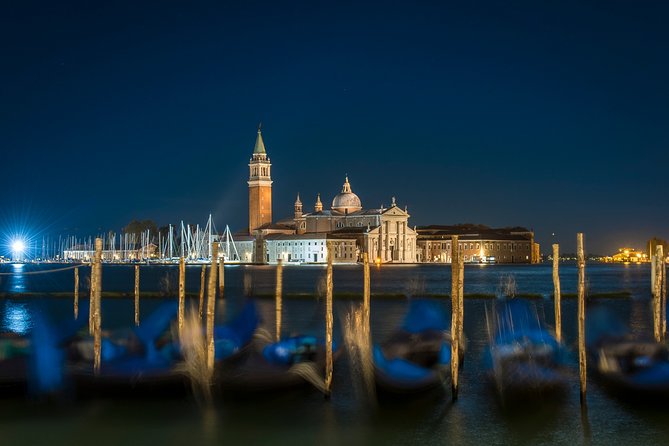
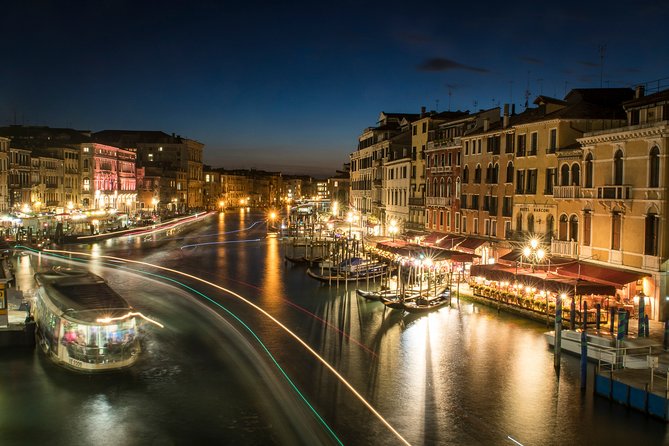
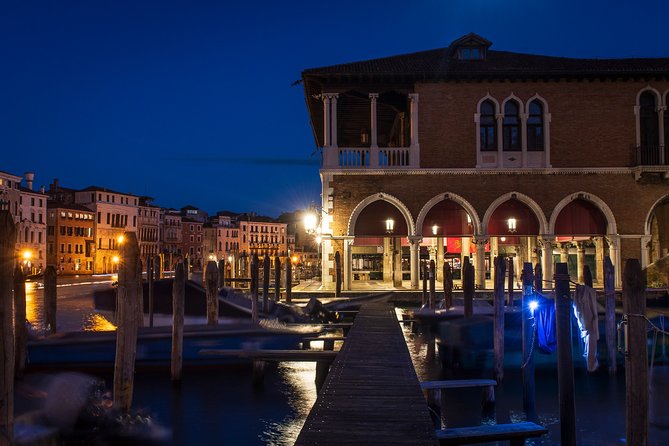
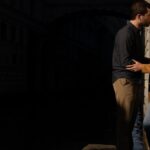
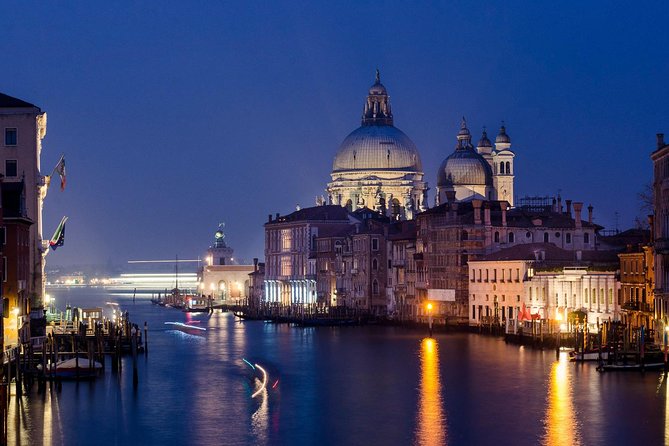
Night photography on the Grand Canal: manual control and light effects
This is the part many people book for, and it’s handled in a practical way: you stroll along the Grand Canal, then test night techniques like long exposure light streaking and light painting.
Night photography is where “I’ll figure it out later” usually breaks down. In the dark, your settings matter more, and mistakes are harder to fix without guidance. One past booking highlighted manual mode coaching, including how to set a timer in coordination with your manual settings. That kind of detail is gold because it turns night photos from hit-or-miss into repeatable process.
You may also get help with stabilization. In one example, when a participant’s tripod wasn’t available, the instructor used a small tripod setup and worked through getting successful results with a DSLR and manual settings. So if you don’t have every accessory, it doesn’t automatically mean you’re stuck.
What to expect conceptually:
- controlling exposure so lights don’t become pure blobs
- using longer shutter speeds to capture streaks in motion water and traffic lights
- finding angles where illumination outlines architecture instead of just lighting up the sky
- practicing light effects without losing your subject
Practical advice: use a timer or remote method if you have it. Even small movements matter more at long shutter speeds.
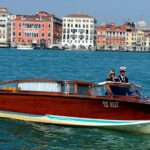
Gear and practical shooting tips for Venice conditions
The lesson is designed around real camera settings, so bring your camera body you’ll actually use. If you have a tripod, it helps for night work and long exposures. If you don’t, focus on learning the “why” behind the instructor’s recommendations so you can improvise.
Venice itself is another factor:
- feet walkways can be uneven, so stabilization and careful stepping matter
- weather can change quickly, and the tour runs in all conditions, so you’ll want rain protection and warm layers
- reflections are strong, so your camera exposure choices will affect highlight detail and shadow depth
One more practical point: this is a walking tour. You’ll be standing and shooting for stretches, so wear shoes you can move in and still keep your balance for low angles near water.
Price and value: is $204.25 per person worth it?
At $204.25 per person, this is priced for one reason: you’re paying for expert instruction during actual shooting time. You’re not just paying to visit landmarks. You’re paying to learn how to make your photos look intentional.
Here’s how to judge value for yourself:
- If you’re a beginner or intermediate who wants quick, usable camera control, the instruction can save you days of trial and error.
- If you already know manual exposure well and you mainly want sightseeing, you might not feel the same value.
- If you’ll be shooting every day anyway, you’ll benefit from learning daylight-to-night workflows in a single evening.
Also note group size. It’s limited to a maximum of four people per booking, and it’s private—so you’re not competing for attention.
Who should book this private Venice photo masterclass
I think this works best for you if:
- you want direct guidance on camera settings rather than generic tips
- you’re excited about St Mark’s and Rialto, but also want to practice real techniques instead of just taking snapshots
- you want night photography coaching, including long exposure and light effect methods
- you like learning by doing, while you’re standing in front of the scene
It’s also a strong option if you’re traveling early in your trip and want to apply what you learn immediately. Past participants used the knowledge throughout the rest of the days in Venice, because they understood the basics enough to keep experimenting on their own.
Should you book it?
If your goal is photos that look planned—daylight, sunset mood, and Grand Canal night effects—then yes, this is an easy “should.” The private format, the focus on how your camera settings change outcomes, and the route that moves from iconic landmarks into real night practice are a winning combination.
If you’re mainly after a casual walk, or you only want a couple quick pictures, you might prefer a simpler tour or self-guided route. But if you want to leave with repeatable shooting skills and a clearer sense of how Venice light behaves, this private masterclass is a solid bet.
FAQ
How long does the Venice Photography Masterclass take?
The experience runs for about 3 hours.
Is this a private lesson or a group tour?
It’s private. Only your group participates, with a maximum of 4 people per booking.
Where do we meet, and where does the tour end?
You meet at Campo San Vidal (Campo S. Vidal, 30124 Venezia VE, Italy). The tour ends back at the same meeting point.
What language is the class taught in?
It’s offered in English.
What locations will we photograph during the lesson?
The route includes Piazza San Marco, Ponte di Rialto, Ponte dell’Accademia, and Campanile di San Marco, plus scenic spots for sunset and night photography along the Grand Canal.
Are there admission tickets included for the stops?
For the listed stops, admission tickets are free.
Do you provide hotel pickup or drop-off?
No. Transportation to/from attractions and hotel pickup and drop-off are not included.
What if the weather is bad?
The tour operates in all weather conditions. You’ll be asked to dress appropriately.
Is there an extra access fee for some visitors?
On certain dates, day visitors staying outside of Venice may be required to pay a €5 access fee. Details and exemptions are provided here: https://cda.ve.it